
Compost? Heard of it, maybe tried it, only to end up with a smelly, soggy mess?
I feel you! Composting can sound like a science experiment gone wrong, but trust me, it’s like the secret superpower of any gardener (and earth-lover!).
Today, we’re demystifying the magic of turning kitchen scraps and yard waste into black gold for your plants. No fancy equipment, no chemistry degree needed, just some simple tips and tricks to transform your “trash” into treasure.
So ditch the guilt of food waste and join me on this journey to happier plants, healthier soil, and a lighter footprint on the planet. Let’s get dirty (in the best possible way)!
What Exactly Is Composting?
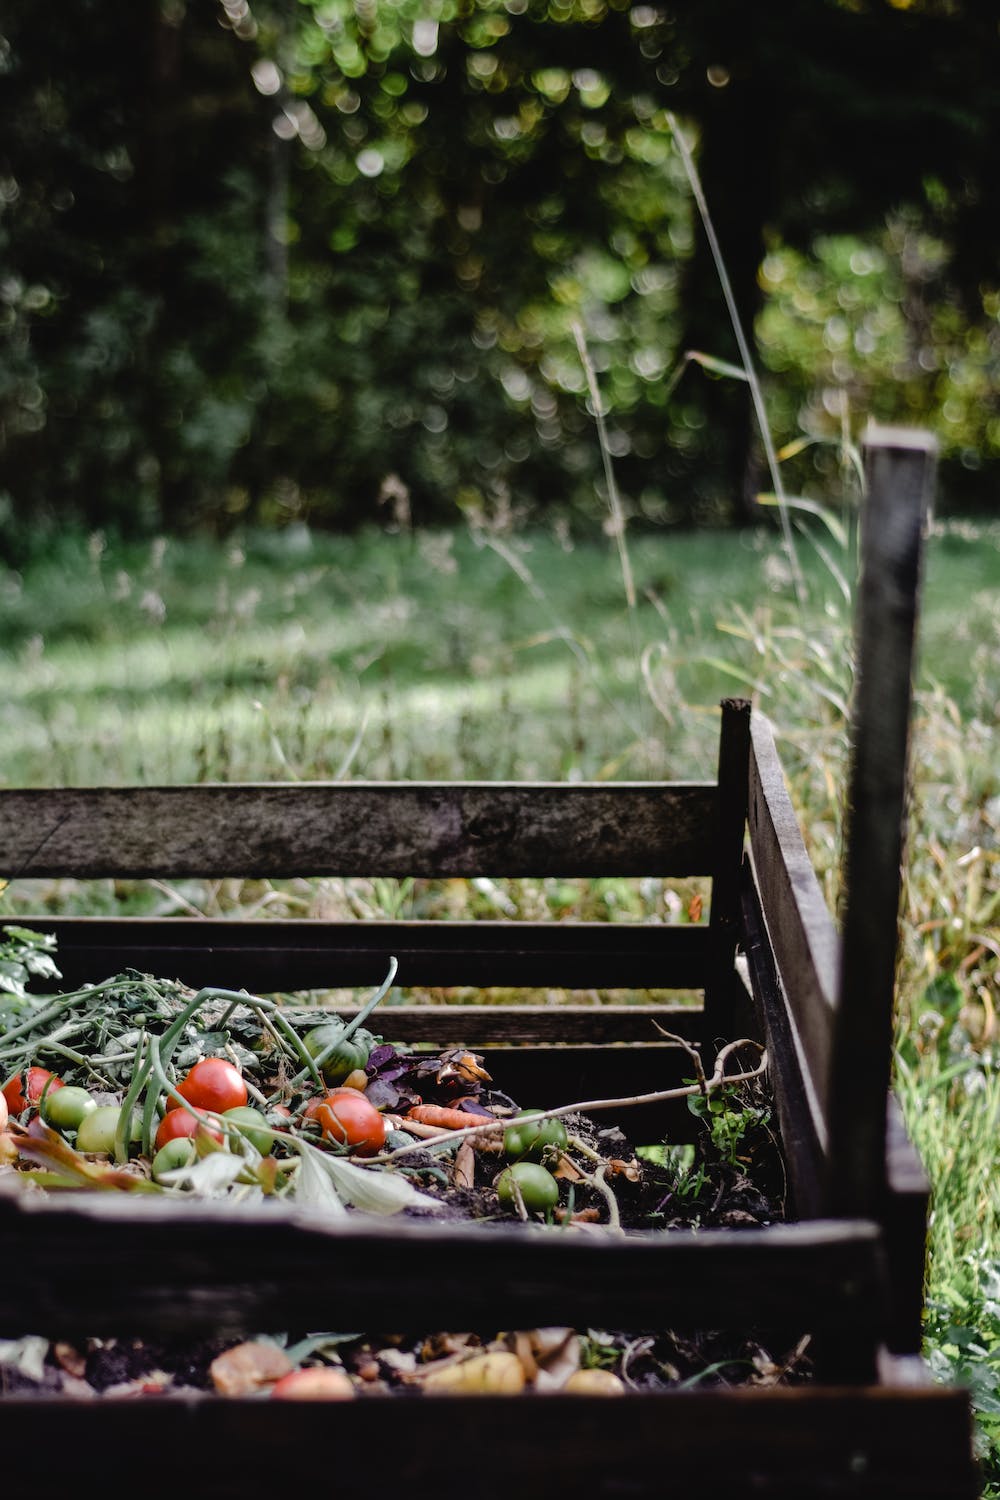
At its core, composting is a natural process where organic matter, like kitchen scraps and yard waste, breaks down into a nutrient-rich material known as compost. This process is facilitated by microorganisms such as bacteria and fungi, along with larger organisms like worms and insects.
Think of composting as nature’s way of recycling. It transforms what we often consider waste into something incredibly valuable for our gardens.
Why Compost?
Reducing Environmental Impact
One of the most compelling reasons to start composting is its positive impact on the environment. Each time we throw away kitchen scraps or yard waste, they often end up in landfills. In these oxygen-starved environments, this organic waste produces methane, a greenhouse gas that’s significantly more potent than carbon dioxide.
By composting, we can divert a substantial amount of this waste. This not only reduces methane emissions but also lessens the burden on our already overflowing landfills. It’s a simple step we can take at home that contributes to a much larger environmental benefit.
Benefits for Your Garden
Compost is often referred to as “black gold” by gardeners, and for good reason. It’s an excellent soil conditioner, enriching the soil with vital nutrients. This nutrient boost promotes healthier, more robust plant growth.
Moreover, compost improves soil structure. Whether your garden has heavy clay soil or sandy soil, adding compost helps. In clay soils, compost aids in better drainage and aeration, while in sandy soils, it enhances water retention. This means your plants get the right balance of air and moisture, key ingredients for healthy growth.
What You Can and Can’t Compost
Composting primarily involves two types of materials: greens and browns. Getting the right mix of these is like creating a recipe for success in your compost bin.
Greens: The Nitrogen Providers
Greens are your nitrogen-rich materials. They are usually moist and quick to decompose. Examples of greens include vegetable scraps from your kitchen, fruit peels and leftovers (but avoid citrus peels as they can be too acidic), coffee grounds, and grass clippings.
These materials provide essential nutrients and help to speed up the composting process. Just be cautious with grass clippings – if your lawn has been treated with chemicals, it’s best to leave them out of your compost.
Browns: The Carbon Source
Browns, on the other hand, are carbon-rich materials. They are typically dry and take longer to decompose. Examples of browns are dry leaves, straw, wood chips, and even shredded paper or cardboard.
Browns are vital for creating a balanced compost mix. They add bulk and help to aerate the compost pile, preventing it from becoming too dense and wet.
Items to Avoid
While composting is a great way to recycle organic materials, there are certain items you should avoid adding to your compost bin. Meat, dairy products, and oils can attract pests and produce unpleasant odors. Diseased plants might spread pathogens in the compost, and it’s best to steer clear of them. Also, pet waste, especially from cats and dogs, can contain harmful pathogens and should not be included.
Remember, the key to successful composting lies in balancing these greens and browns. Too many greens, and your compost could become slimy and smelly. Too many browns, and the decomposition process slows down. Striking the right balance will help you create rich, nutritious compost for your garden.
How to Choose the Right Composting Method
There are several methods to choose from, each with its own advantages and considerations. Let’s explore some of the most popular methods: compost bins, tumblers, piles, and vermicomposting.
1. Compost Bins
Compost bins are a great choice if you’re looking for something low-maintenance. They can be either open or closed and come in various sizes. Open bins are perfect for large amounts of yard waste like leaves and grass clippings. Closed bins are more suitable for kitchen scraps as they help keep out pests and retain moisture.
Pros: Easy to maintain, good for beginners, and keeps things neat.
Cons: Can be slower to compost, and turning the compost can be a bit of a chore.
2. Compost Tumblers
Compost tumblers are essentially barrels that you can turn. They are fantastic for speeding up the composting process because turning them is easy, which means you’re regularly aerating your compost.
Pros: Faster composting, easy to turn, and less labor-intensive.
Cons: Usually more expensive and have a smaller capacity than bins.
3. Compost Piles
If you have the space, a simple compost pile can be an effective method. It doesn’t require any special equipment – just start piling up your compostable materials in a corner of your yard.
Pros: Low cost, easy to start, and great for large volumes of waste.
Cons: Requires more space, and managing odors and pests can be challenging.
4. Vermicomposting
Vermicomposting, or worm composting, uses red wiggler worms to break down kitchen scraps. It’s ideal for indoor composting and is a fun way to compost if you don’t have a lot of space.
Pros: Great for small spaces, produces high-quality compost, and is fast and efficient.
Cons: Requires managing the health of the worms and is more hands-on.
Choosing the Best Method for You
When choosing a composting method, consider your space, the amount of waste you produce, and how much effort you want to put in. If you have a small garden or limited outdoor space, vermicomposting or a compact tumbler might be best. For those with more yard space and larger volumes of garden waste, a compost bin or pile would be more suitable.
Remember, there’s no one-size-fits-all solution. It’s about what works best for you and your garden. So, choose a method that aligns with your lifestyle, and you’ll be a composting pro in no time!
How to Set Up Your Compost Bin
Step-by-Step Instructions for Setting Up a Compost Bin
- Choose Your Bin: You can either buy a compost bin or make one. There are various designs available, from simple plastic bins to more elaborate rotating tumblers.
- Select the Location: Look for a spot that is convenient for you but also suitable for composting. It should be a flat, well-drained area. If possible, place it near your garden and kitchen to make adding scraps and using the compost easier.
- Prepare the Ground: Clear the area where you’ll place your bin. If you’re using an open-bottomed bin, it’s a good idea to lay down a wire mesh to prevent rodents from getting in.
- Assemble the Bin: Follow the manufacturer’s instructions if you bought a bin. If you’re making your own, ensure it’s sturdy and has enough ventilation.
- Add Your Compost Materials: Start with a layer of browns (like dry leaves or straw) at the bottom for good airflow. Then, add your greens (like kitchen scraps and grass clippings). Remember the rule of balancing greens and browns.
- Cover the Bin: If your bin doesn’t have a lid, cover it with a tarp or wood lid. This helps retain moisture and heat, which are critical for composting.
Tips for Location
- Accessibility: Make sure your compost bin is easily accessible year-round. You don’t want to trek through heavy snow or mud to get to it.
- Sunlight: A little bit of sunlight is beneficial as it helps to warm the compost, speeding up the decomposition process. However, too much direct sunlight can dry out your compost.
- Water Source: Having a water source nearby is handy. Sometimes, you might need to add a bit of water to keep the compost moist.
- Away from Trees: Try to avoid placing your bin right under trees. Tree roots can grow into the compost, and branches overhead can limit rainwater access.
How to Balance Greens and Browns in Composting
In composting, greens provide nitrogen, which is essential for the growth of microorganisms in the pile. Browns, on the other hand, supply carbon, which fuels these microorganisms. If you have too many greens (nitrogen), your compost pile can become smelly and slimy. Too many browns (carbon), and the composting process can slow down significantly.
Tips for the Right Balance
- Use a Simple Ratio: A general rule of thumb is to use a 1:3 ratio of greens to browns. This means for every bucket of green material, you should add three buckets of brown material.
- Observe and Adjust: Pay attention to your compost pile. If it’s too wet and smells bad, add more browns. If it’s too dry and not breaking down, add more greens.
- Mix Well: When you add new materials, don’t just pile them on top. Mix them into the existing compost to help evenly distribute the greens and browns.
- Chop or Shred Larger Pieces: This increases the surface area and helps speed up the decomposition process. Smaller pieces of green and brown materials will also mix together more easily.
- Keep a Stockpile of Browns: Browns can be harder to find than greens, especially in winter. Keep a stockpile of leaves, straw, or shredded paper so you can add them as needed.
- Be Patient: Composting doesn’t happen overnight. It takes time for the materials to break down, so be patient and give your compost pile the time it needs.

How to Maintain Your Compost
Turning your compost is like stirring a pot of soup – it mixes everything up and ensures an even cook, or in this case, decomposition. Aim to turn your compost every 3-4 weeks. If you’re composting more actively, you can turn it more frequently, like every 1-2 weeks.
Use a garden fork or a compost aerator tool to turn your pile. You want to bring the material from the outside to the inside and vice versa. This process helps to aerate the pile and speeds up decomposition.
Your compost should be moist like a wrung-out sponge. If it’s too dry, the decomposition process slows down. If it’s too wet, it can get smelly and slimy. If your compost is too dry, add water or green materials. If it’s too wet, add browns to absorb excess moisture and improve aeration.
Turning helps with aeration, but you can also add bulky materials like wood chips or straw to create air pockets and improve airflow.
Common Issues and How to Solve Them
- Bad Odors: If your compost smells, it’s usually too wet or lacks enough brown material. Balance it out with more browns and turn it to introduce air.
- Pests: To deter pests, avoid adding meat, dairy, and oily foods. Make sure your bin has a lid, and bury food scraps under browns.
- Slow Decomposition: This often means not enough nitrogen (greens), too little moisture, or poor aeration. Adjust accordingly.
How to Use Your Compost in Your Home Garden
Signs Your Compost is Ready to Use
- Appearance and Smell: Ready compost looks dark, crumbly, and has an earthy smell. It shouldn’t have any recognizable food or yard waste in it.
- Temperature: The compost pile should be about the same temperature as the surrounding air. A hot pile means it’s still actively composting.
- Time: Depending on your composting method and materials, it can take anywhere from a few months to a year for compost to be ready.
How to Harvest Your Compost
- From a Bin or Tumbler: If you have a bin or tumbler, the finished compost usually ends up at the bottom. Scoop out the finished compost, leaving unfinished materials to continue decomposing.
- From a Pile: With a pile, you might need to sift through to separate finished compost from larger, unfinished pieces. You can use a screen or a mesh to sift.
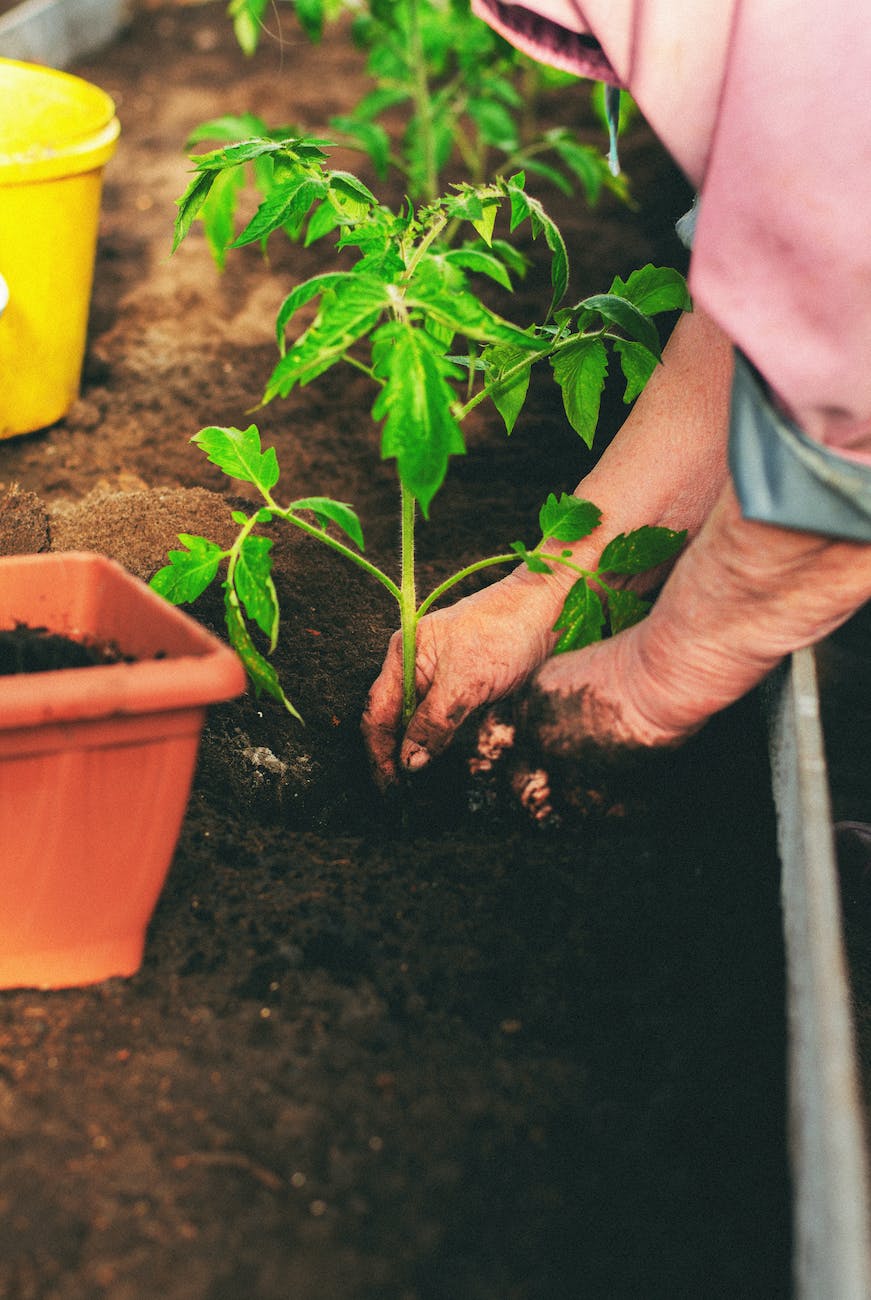
Using Compost in Your Garden
Compost is incredibly versatile and can be used in several ways:
- Soil Amendment: Mix compost into your garden soil before planting. This improves soil structure, nutrient content, and moisture retention.
- Mulch: Spread compost on top of the soil around your plants. This helps retain moisture, suppress weeds, and slowly adds nutrients to the soil.
- Potting Mix: You can also use compost in your potting mixes. Blend compost with other potting materials to provide a nutrient-rich environment for container plants.
Advanced Composting Tips
Techniques for Faster Decomposition
- Shredding Materials: The smaller the items in your compost, the quicker they’ll break down. Shredding or chopping your kitchen and yard waste can significantly speed up the composting process. For example, run your lawnmower over fallen leaves to break them down before adding them to your compost.
- Adding Compost Activators: Compost activators can kickstart the decomposition process. These are high-nitrogen materials such as manure, blood meal, or even a shovel of garden soil. They introduce microorganisms and nutrients that accelerate composting. You don’t always need commercial activators; sometimes, just adding a little fresh grass clippings or green kitchen waste can do the trick.
Seasonal Composting Tips
- Spring: This is a great time to start a new compost pile as you’ll likely have plenty of green material from your garden. It’s also a good time to harvest compost that’s been decomposing over the winter.
- Summer: The warm weather speeds up decomposition, but it can also dry out your compost. Regularly check moisture levels and add water if your compost feels too dry.
- Fall: With leaves falling, you’ll have an abundance of browns. This is perfect for balancing out the greens from your kitchen. Remember to shred the leaves for faster decomposition.
- Winter: Composting slows down in the cold, but it doesn’t stop. You can insulate your pile with straw or leaves to retain heat. If you’re composting in a tumbler or bin, it will generally continue to decompose, albeit at a slower pace.
Final Thoughts: How to Start Composting for Beginners
With these simple steps and a sprinkle of patience, you’re on your way to composting like a pro. Watch that pile transform from messy scraps to earthy goodness, and revel in the satisfaction of giving back to your garden and the planet. Before you know it, you’ll be a compost connoisseur, whipping up dark, crumbly gold like nobody’s business.
And remember, I’m here to cheer you on every step of the way! Have questions? Hit me up in the comments – no compost query is too silly. Let’s make composting the coolest (and greenest) thing on the block, one kitchen scrap at a time.


